Testing communication with the device
- Create a new site/application based on the "myDataconC3" application for operation on the myDatanet server (see Creating the site).
- Configure the created site/application according to your requirements (see Site configuration).
- Connect the antenna (see Connection of the mobile network antenna).
- You can achieve this by establishing the power supply (see
Connection of the sensors, actuators and the supply). The status LED should then start flickering (see Status LED) to signalise the connection
establishment.
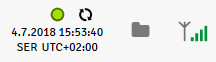
- Wait until it is indicated in the list of measurement instruments that the device is
connected to the server (rotating arrows).
- Complete all of the steps detailed in the chapterConnection of the sensors, actuators and the supply. This includes connecting the sensors.
Important: All wiring work must be performed in the de-energised state!
- Click on the "Direct report" symbol in the list of sites / applications to display the
data stored on the myDatanet server.

- Wait until several measurement values have been recorded.
The default connection type for myDataconC3 is "online" mode. In this operating mode, the determined measurement data is immediately transmitted to the myDatanet server. I.e. the data displayed on the myDatanet server is updated in record interval (see Basic settings).
If the connection type "interval" is used, the transmission of the measurement data has to be triggered manually. Use the button (see Button) for this purpose. Only the data up to the moment of triggering the transmission is transferred. If you require additional measurement data, you have to trigger the transmission again using the button.
- Check whether the data available is up to date and plausible (especially the measurement value "voltage" and "GSM").


