Creating the site
Detailed instructions on creating a new site are provided in myDatanet Server Manual myDatanet Server Manual (805002).
- Log in via the web interface on the myDatanet server. You will receive the web address from your responsible sales partner.
Login form of the myDatanet server
- Click on the "Customer" menu item of the myDatanet server to call up the list of available
customers. Select an existing customer or create a new customer.
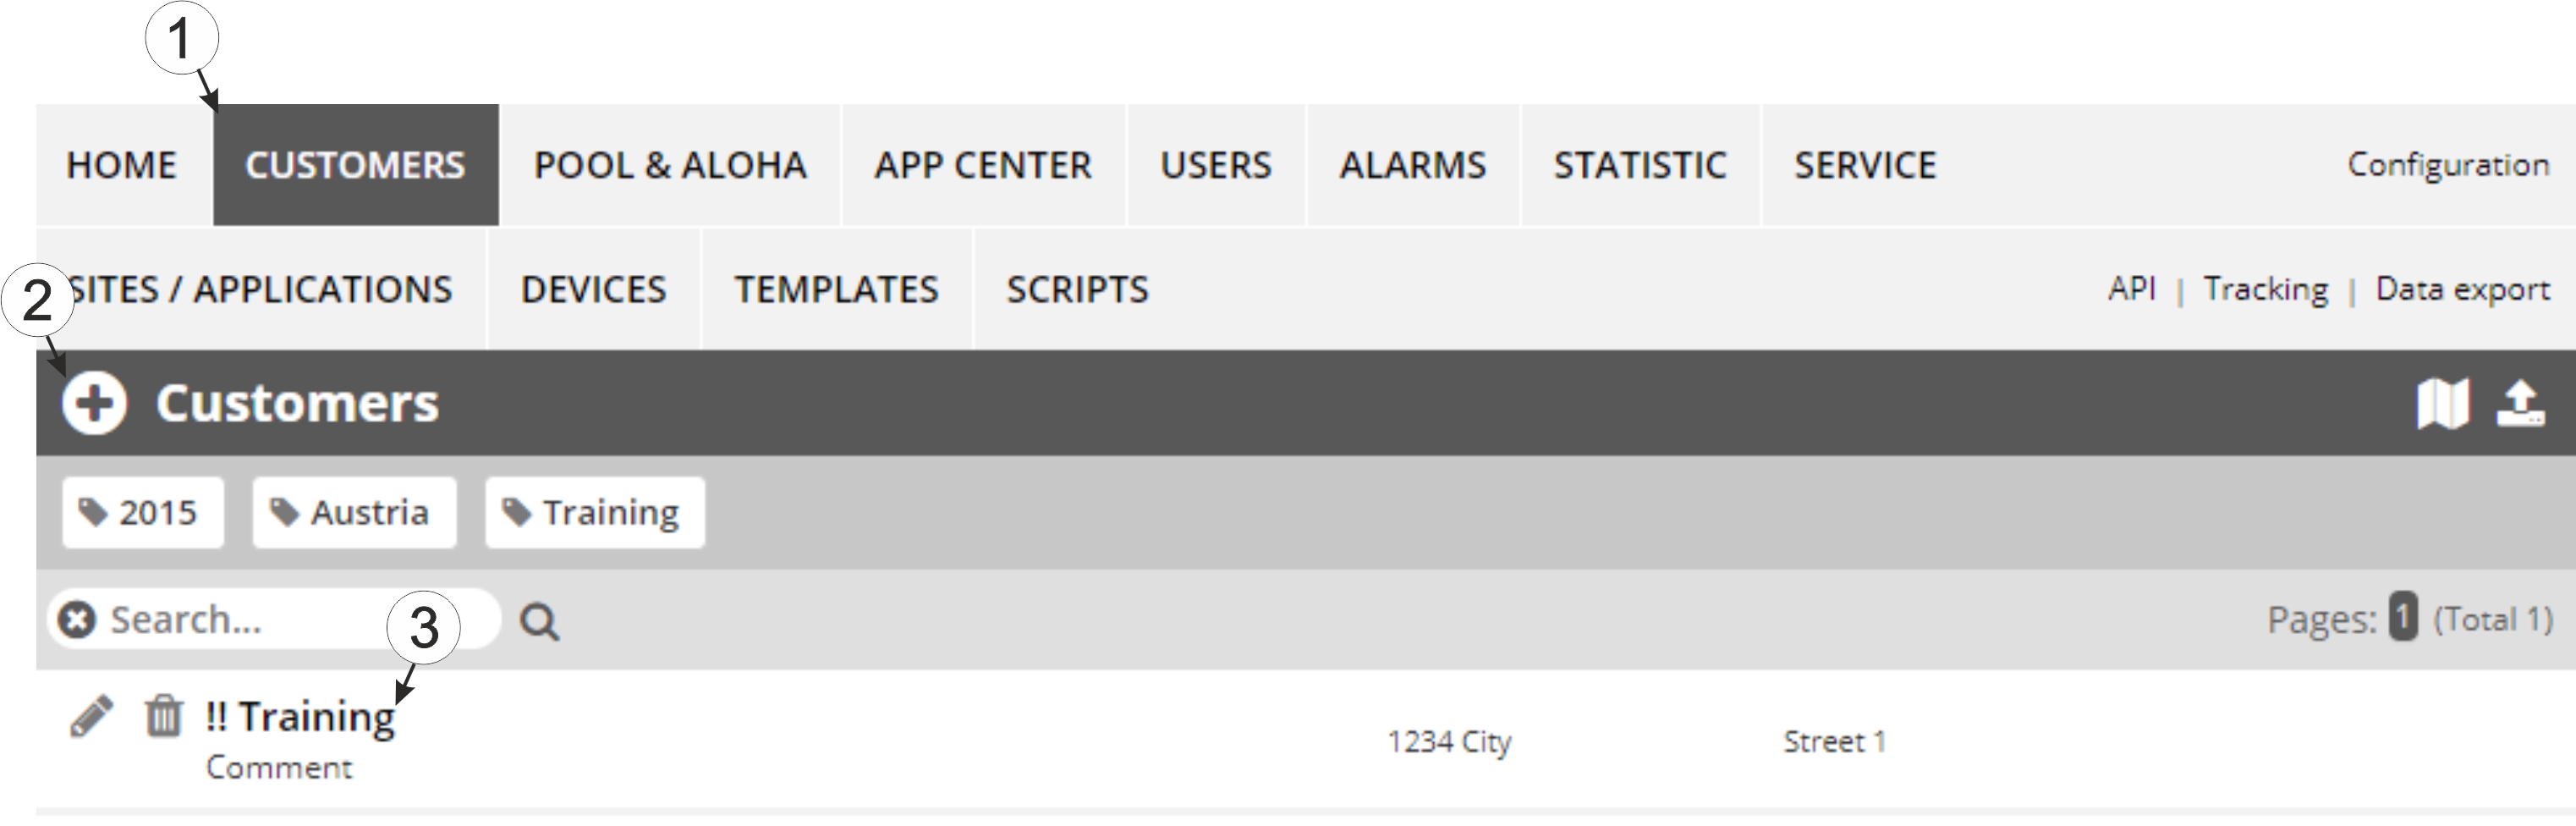
Selecting the customer
1 Menu item to call up the list of customers 3 List of available customers 2 Creating a new customer - Click on the "Sites / Applications" menu item of the myDatanet server to call up the list of existing sites
/ applications. Then open the wizard for creating a new site by clickeng the "Add new
site / application" symbol.
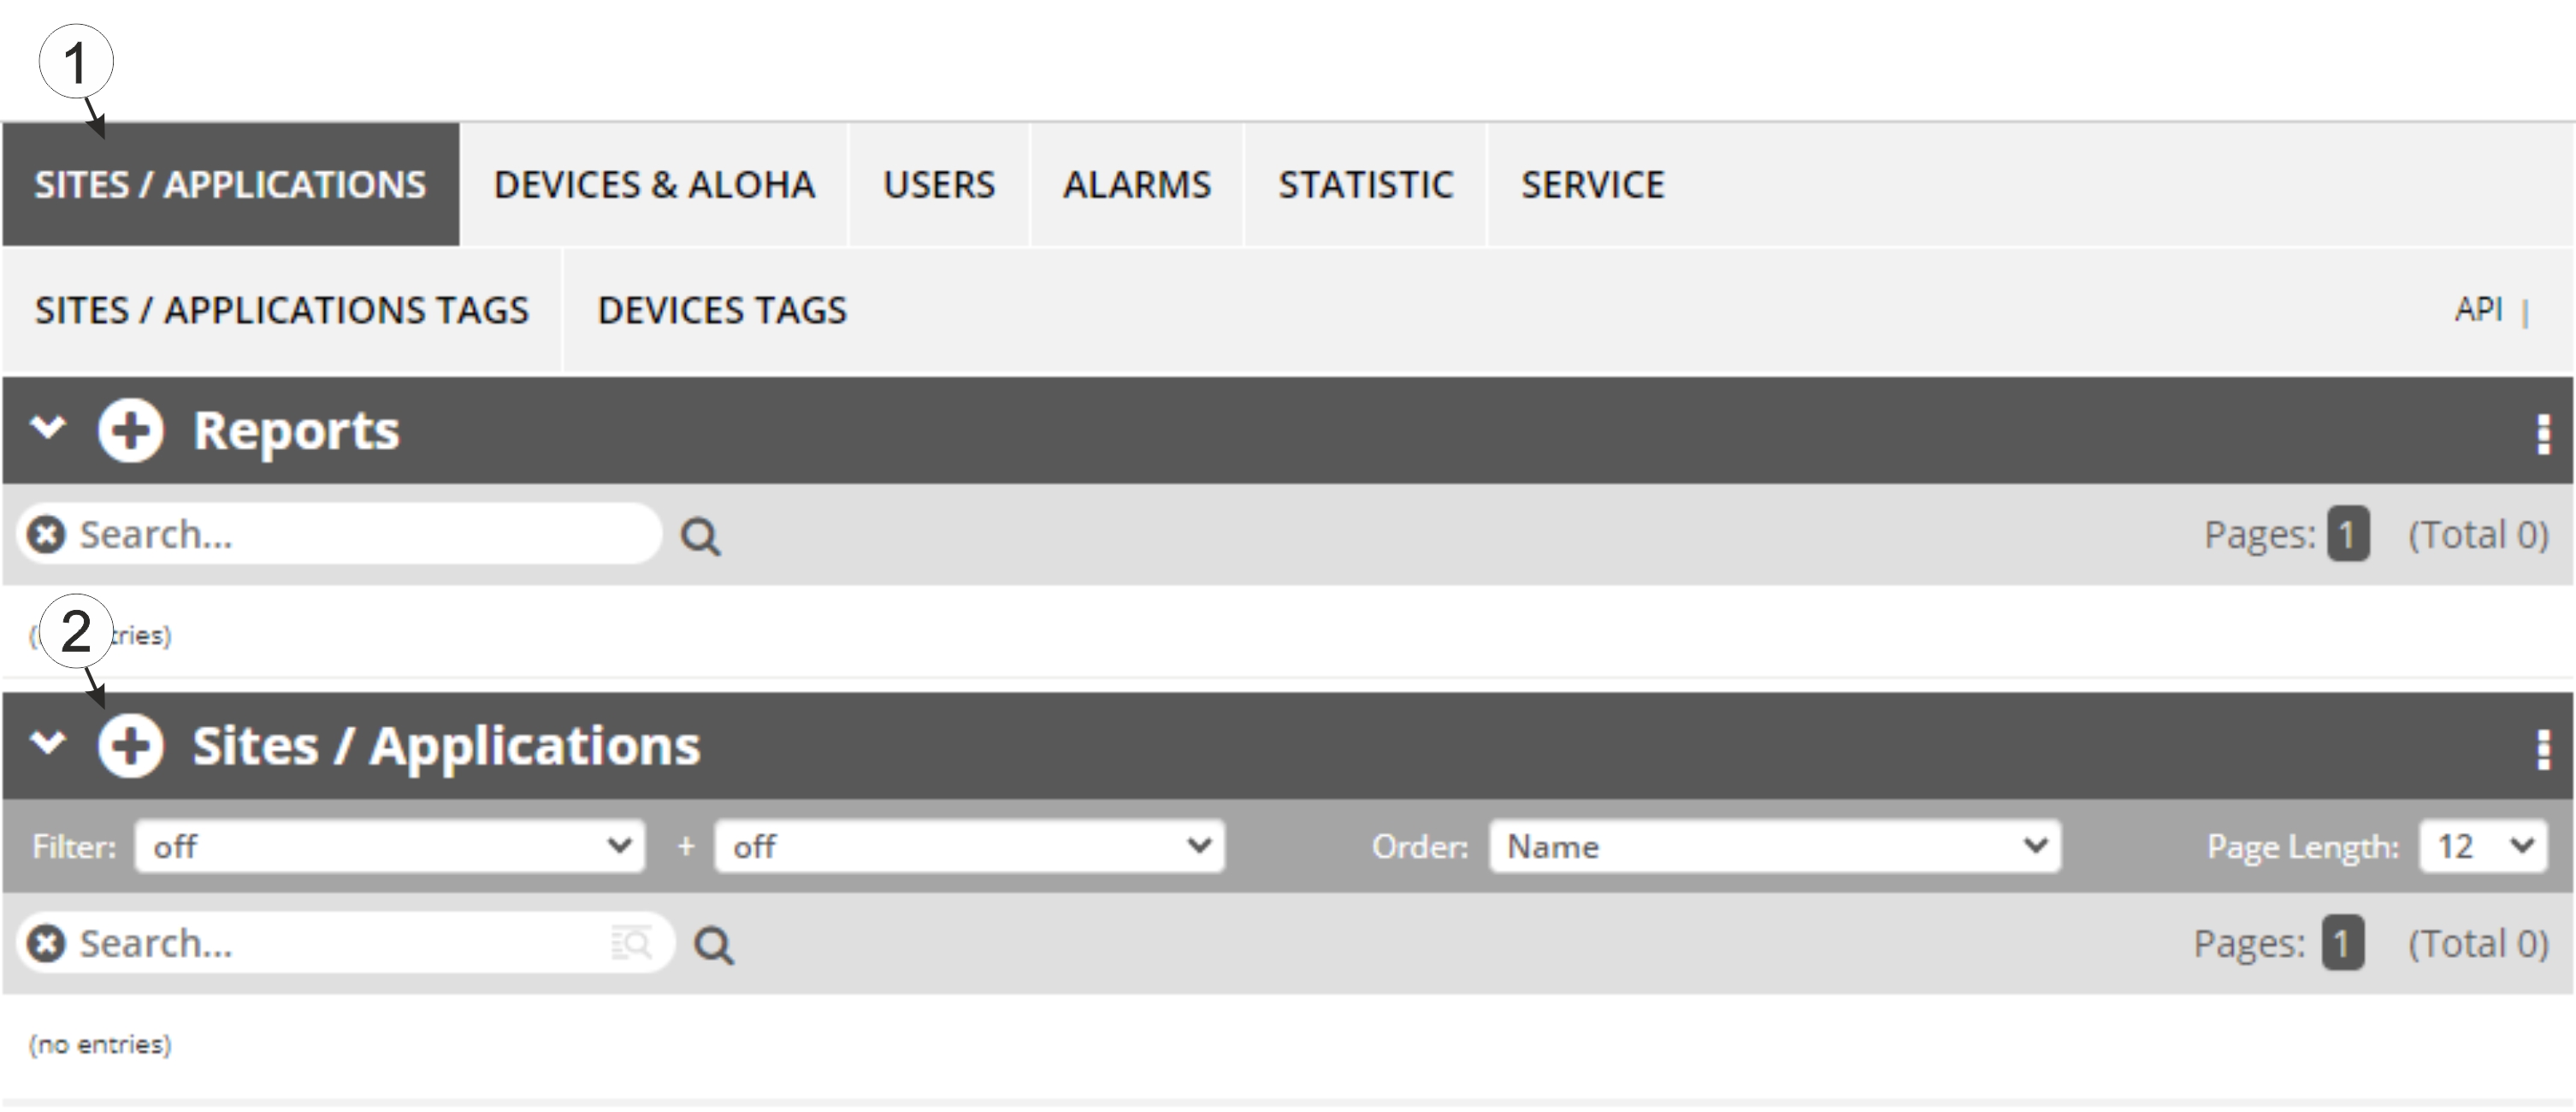
Opening the wizard for creating a site
1 Menu item to call up the list of existing sites / applications 2 "Add new site / application" symbol - Follow the instructions of the wizard until you can see the button "create site". By
clicking the button "back" you can always return to the previous step and modify the your
chosen settings.
Tip: Depending on the functions activated on the myDatanet server, some of the steps in the following illustration may not be required and are therefore not displayed.
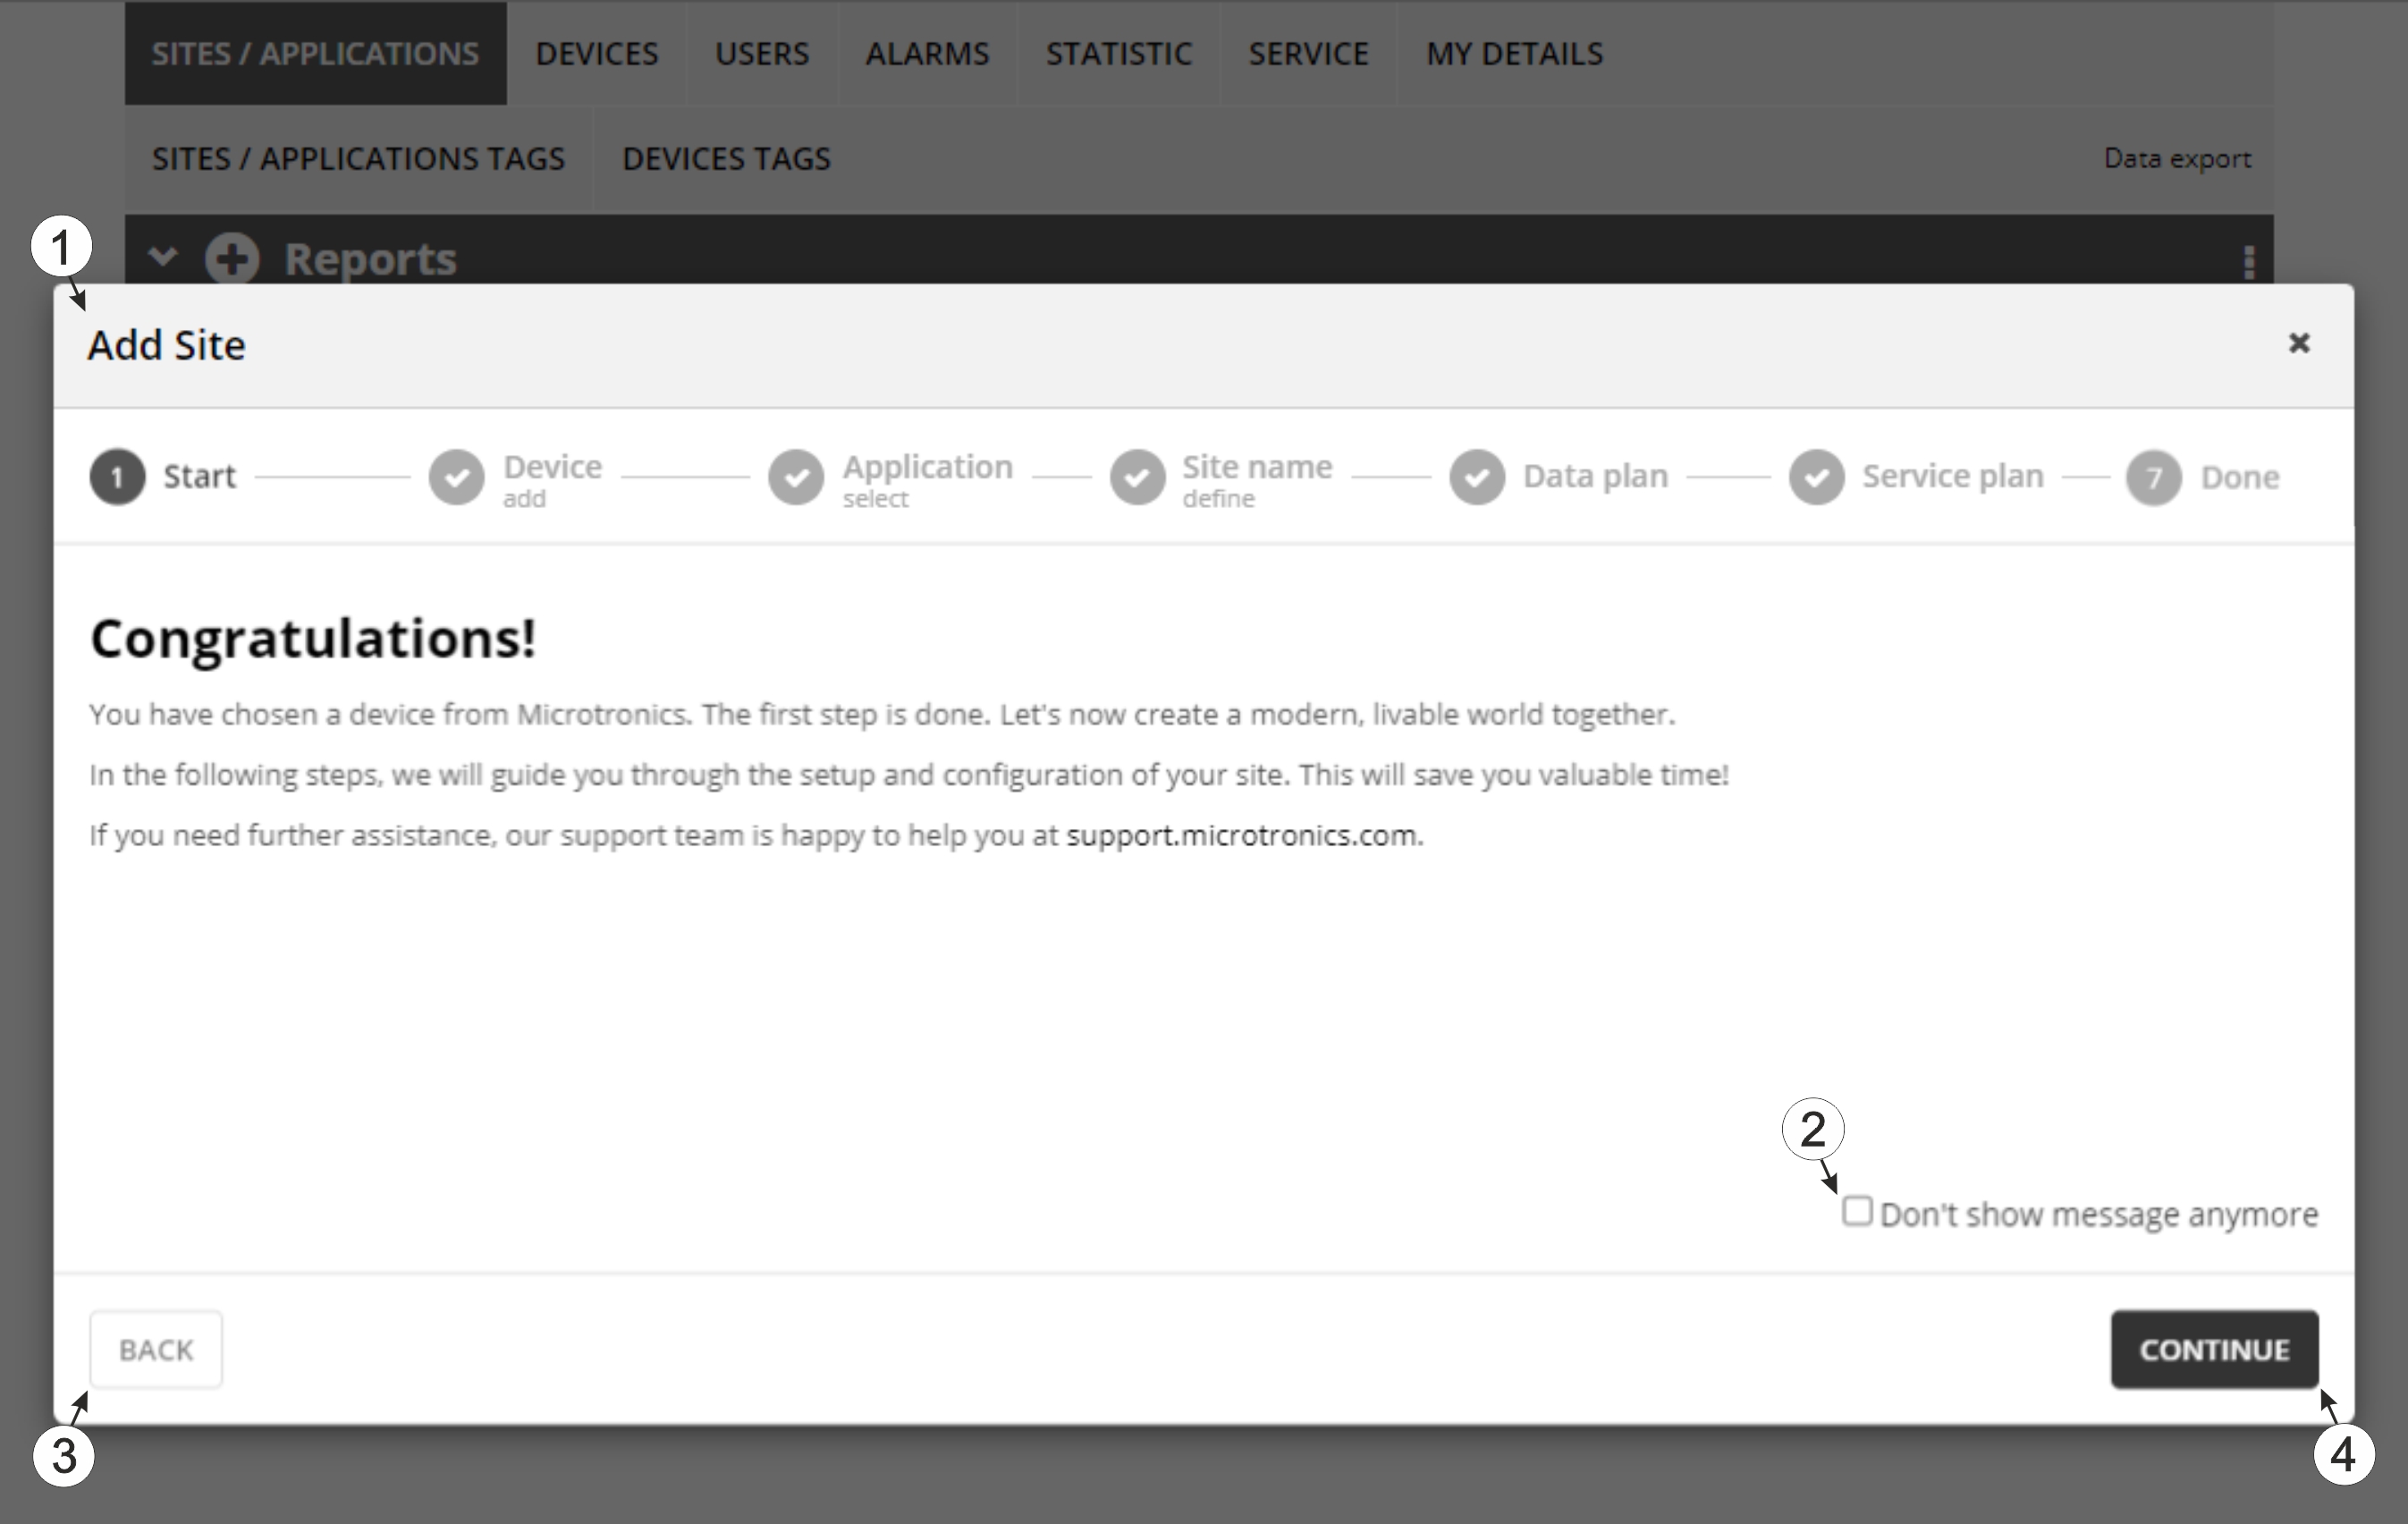
Create site using the wizard
1 Wizard for creating a new site 3 "Back" button (return to previous step of wizard) 2 Do not display welcome message again next time the wizard is run 4 "Continue" button (continue to next step of wizard) - Verify the information in the summary, read the general terms and conditions and tick
the checkbox to accept the general terms and conditions. Then click on the "Create site"
button to finalise the process.
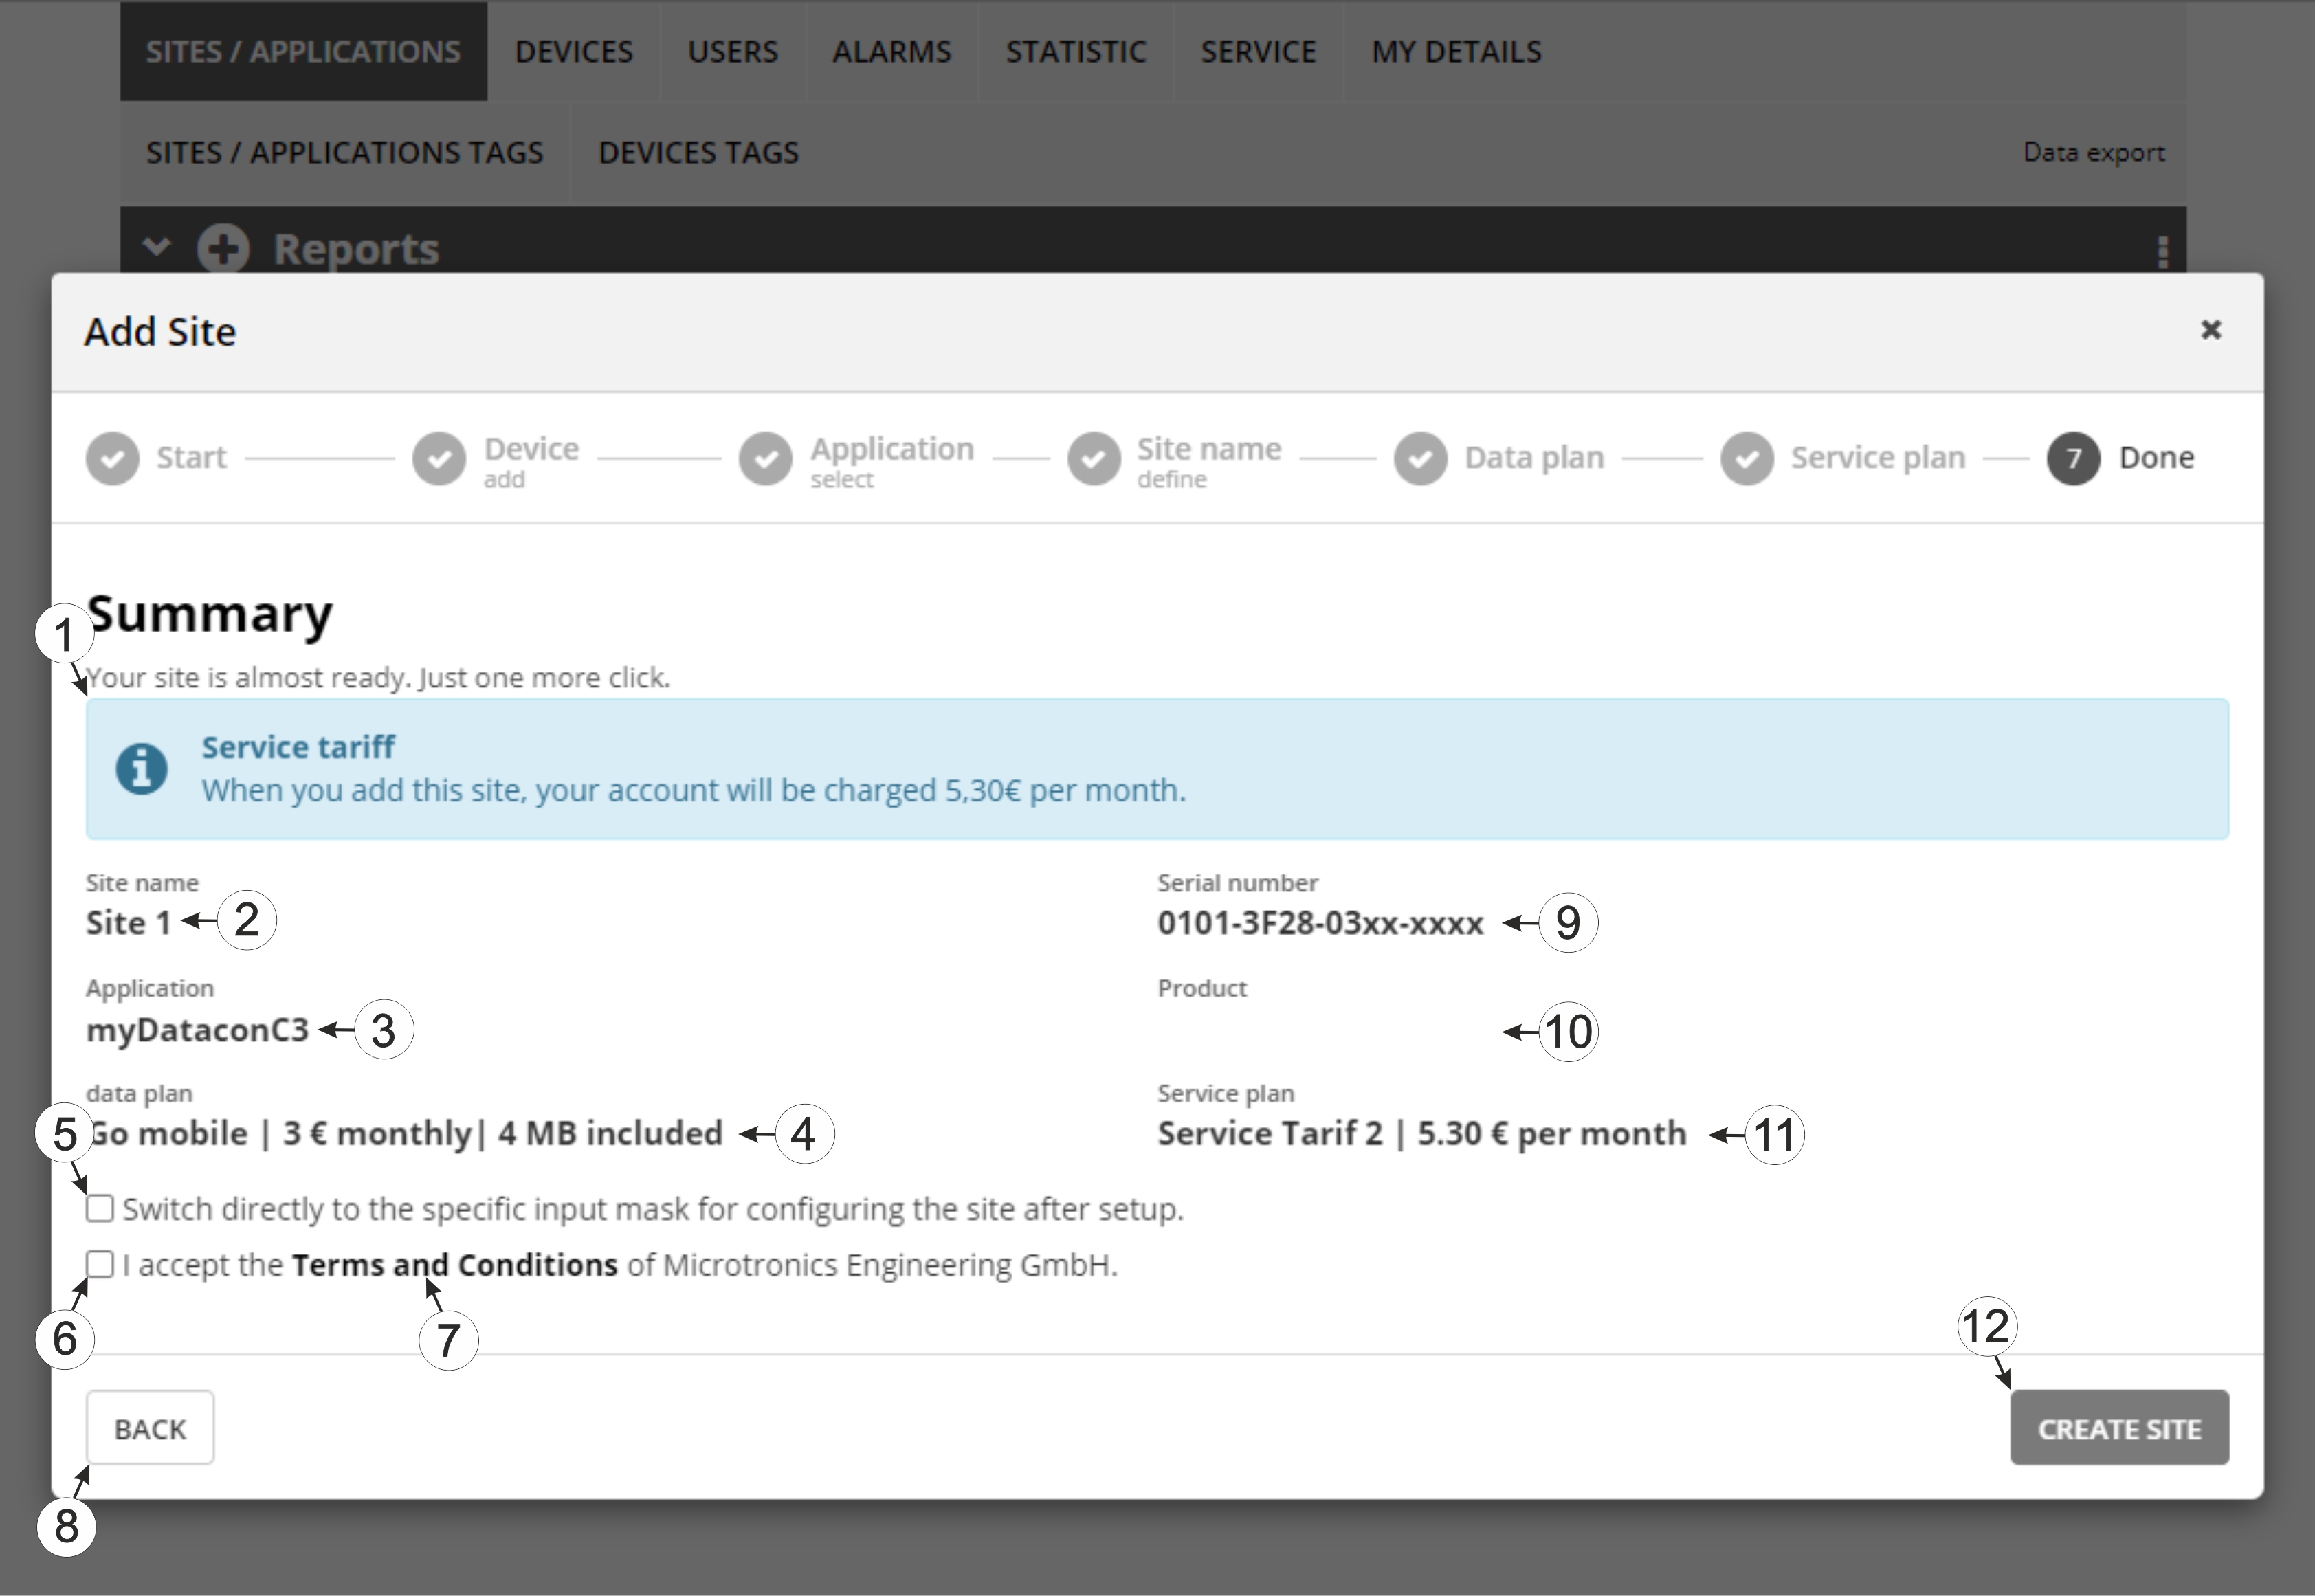
Completing site creation
1 This amount is debited from the customer's account for this site immediately upon creation and subsequently on a monthly basis. (Only displayed if the account module or the billing module is activated on the server) 2 Name defined for the site, which is then also displayed in the list of sites 3 Application selected 4 Data plan selected (Only displayed if the account module is activated on the server) 5 Checked: After clicking "create site", the specific input mask for configuring the site is opened. Not checked: After clicking "create site", you return to the list of sites.
6 Checkbox to accept the general terms and conditions 7 Link to the general terms and conditions 8 "Back" button (Allows for modifying the chosen settings) 9 Serial number of the device connected to the site 10 Product name as specified on the type plate of the device (Only displayed if the information is stored in the device) 11 Service plan selected (Only displayed, if the billing module is activated on the server) 12 "Create site" button


