Using the local radio connection and the myDatanet server
You will need the "OnSite Companion" smartphone app to commission the Jellox Analog . It is available for both Android and iOS and can be downloaded free of charge from "Google Play" (Android) or the Apple "App Store" (iOS) respectively. However, the application can also be accessed as a progressive web app at the following address:
https://companion.microtronics.com/
Detailed instructions on using the "OnSite Companion" smartphone app are provided in chapter OnSite Companion.
The following work should be completed in the office before you go to the future location of the device:
- If necessary, create a customer on the myDatanet server (see "myDatanet Server Manual " 805002).
- Within the desired customer, create a new site/application for operation of the Jellox Analog on the myDatanet server (see Creating the site).
- Use the "OnSite
Companion" smartphone app to
synchronise the Jellox Analog and the myDatanet server (see Synchronisation with the myDatanet server). Select "Synchronise device", use the magnifying glass icon to search
for compatible devices and click on the desired device in the list displayed.
The application can also be accessed as a progressive web app at the following address (https://companion.microtronics.com/). This means that a PC or laptop can also be used instead of a smartphone. However, in this case, the search for devices within range is not available. The serial number must be entered manually or scanned using the camera icon.
- Configure the created
site/application according to your requirements (see Site configuration).
The following settings should be adjusted if you use a remote sensor module for level measurement:
- If already known, enter the intended installation height (see Remote sensor module of type LVL-R-5) or the offset of the sensor module (see Remote sensor module of type Gauge) in the relevant input field.
- Ensure that the parameter "Trim" is set ot 0 (see Remote sensor module of type LVL-R-5 or Remote sensor module of type Gauge).
The following settings should be adjusted if you use a remote sensor module for surface velocity measurement:
- If already known, enter the intended mounting angle and direction of flow (upstream or downstream) of the sensor module in the relevant input field (see Remote sensor module of type VEL-R-5).
The following settings should be completed if a sensor with mA output is used:
- If already known, enter the required offset in the corresponding input field (see Universal input).
- Ensure that the parameter "trimming" is set to 0 (see Universal input)
- Activate the synchronisation between Jellox Analog and the myDatanet server again to transmit the configuration of the site to the Jellox Analog .
- Place the sensor module in the final installation position. Tips and information on the installation of the sensor module are provided in the user manual of the relevant sensor module.
- If you want to use a sensor with mA output, complete all steps described in chapter Connecting the sensor.
- Deactivate the transport mode by setting the "operating mode" in the input window "Device settings" (see Device settings ) to "normal".
- Use the "OnSite
Companion" smartphone app to
synchronise the Jellox Analog and the myDatanet server (see Synchronisation with the myDatanet server). Select "Synchronise device", use the magnifying glass icon to search
for compatible devices and click on the desired device in the list displayed.
The application can also be accessed as a progressive web app (https://companion.microtronics.com/). This means that a PC or laptop can also be used instead of a smartphone. However, in this case, the search for devices within range is not available. The serial number must be entered manually or scanned using the camera icon.
- If you have not already done so in the office, enter the installation height (see Remote sensor module of type LVL-R-5) or the offset of the sensor module (Remote sensor module of type Gauge) in the relevant input field.
- If you have not already done so in the office, enter the mounting angle and flow direction (upstream or downstream) of the sensor module in the relevant input field (see Remote sensor module of type VEL-R-5).
- Enter the required offset for the sensor with mA output into the corresponding input field (see Universal input) if you haven't already done so at the office.
- Activate the synchronisation between Jellox Analog and the myDatanet server again to transmit the configuration of the site to the Jellox Analog .
- Wait until some measurement values have been recorded.
The waiting time depends on the configured record interval (see Device settings ) and the
number of measurement values that you want to take into consideration when calculating
the zero point adjustment. If necessary, you can shorten the record interval for this
commissioning phase to reduce the waiting time. In this case, trigger the
synchronisation again to transfer the altered record interval from the site to the Jellox Analog .
Note: As the minimum record interval is 10 sec., this process is only suitable if the water level is as consistent as possible during the zero point adjustment.
- Activate the synchronisation between Jellox Analog and the myDatanet server to transmit the recorded measurement values to the myDatanet server.
- Wait until the "OnSite
Companion" smartphone
app indicates that the synchronisation process is completed.
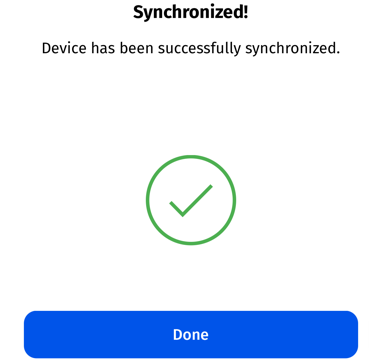
Synchronisation completed
- Click on the "Direct Report" symbol in the list of sites/applications to display the
data saved on the myDatanet server.

- A so-called "report" is used to display the data stored on the myDatanet server (see Reports). Use the "Download" symbol to download the data
of the displayed measurement value graphic as a tsv file and calculate the average
value of the measurement values for the corresponding sensor (i.e. for the sensor
module or the sensor with mA output). Detailed instructions on handling the reports
is provided in the myDatanet Server Manual (805002).

- If the calculated average value do not match the ones of the reference measurement, the zero point will need to be adjusted. To do so, calculate the difference between the calculated average value and the reference measurement and enter a corresponding correction value in the input field for the "Trimming" parameter (see Remote sensor module of type LVL-R-5 or Remote sensor module of type Gauge for sensor modules or Universal input for sensors with mA output). Information on how the parameter "trimming" is integrated in the calculation of the water level can be found in the user manual of the relevant sensor. For sensors with mA output, the value of the parameter "trimming" is added. I.e., if the measurement value is to be reduced when adjusting the zero point, a negative sign is to be set for the parameter "trimming" (see Additional explanation on the zero point adjustment and installation height of the sensor).
- Trigger the synchronisation between Jellox Analog and the myDatanet server again to transmit the altered configuration, i.e. the new value for "Trimming", first to the Jellox Analog and, when using "remote sensors", subsequently to the sensor module.
- If a zero point adjustment is required, repeat all of the steps from step 14 "Wait until some measurement values have been recorded".
- Then compare the
calculated average value of the measurement values of the relevant senor (i.e. for the
sensor module or the sensor with mA output) with the corresponding reference
measurement again If the values are still different, complete the zero
point adjustment again.
Note: The current value of the "Trimming" configuration parameter must now be taken into consideration when calculating the difference between the determined average and the reference measurement. Information on how the "Trimming" parameter influences the calculation of the water level is provided in the relevant user manual of the sensor module. For sensors with mA output, the value of the parameter "trimming" is added to the sensor measurement value.


